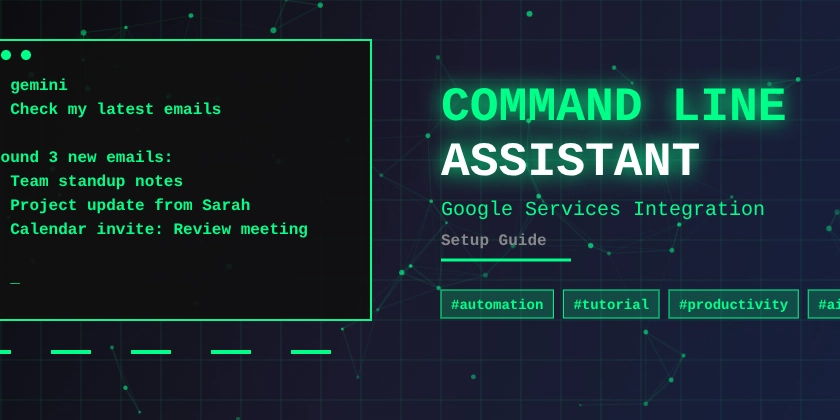
Hey there! Welcome back. It’s been a minute since my last blog on 7 Productivity Hacks That Changed My Life. Remember hack number 3? The wild command line assistant that manages your entire Google workspace from the terminal?
Yeah, that one blew up in the comments. Everyone wanted the full breakdown. So here it is, the complete no-BS guide to setting up your own command line assistant with access to Gmail, Google Drive, Calendar, and basically your entire Google ecosystem.
Why This Setup is Absolutely Insane
Before we dive in, let me paint you a picture of what your life looks like once this is running:
- Send emails without ever opening a browser
- Schedule meetings with a single command
- Upload files to Drive from your terminal
- Search your Gmail like you’re querying a database
- Manage calendar events faster than you can say “productivity”
And the best part? It’s all happening in your terminal. No clicking. No switching windows. Just pure, efficient command-line magic.
What You’ll Need (The Boring But Necessary Stuff)
Look, I’m not gonna sugarcoat it. You need:
- A computer (obviously)
- Stable internet connection (wild requirement in 2024, I know)
- Basic familiarity with terminal/command line
- A Google account
- About 30-45 minutes to set this up properly
One-time setup, lifetime benefits. Let’s go.
Step 1: Install Gemini CLI (And Why Version Matters)
Here’s where most people mess up. You can’t just install the latest version and call it a day.
Why Gemini CLI?
Simple. It integrates seamlessly with Google Apps Script, giving us a robust MCP (Model Context Protocol) server for our command line agent. The integration is chef’s kiss level smooth.
The Version Trap:
I spent hours debugging before I figured this out. You MUST use version 0.1.12. The latest versions? Broken. Buggy. Frustrating.
Save yourself the headache and install the specific version:
npm install -g @google/generative-ai-cli@0.1.12
Verify it installed correctly:
gemini --version
You should see 0.1.12. If not, uninstall and try again.
Step 2: Set Up Google Cloud Console (The Foundation)
This is crucial. Don’t skip this step or you’ll run into permission issues later.
Create Your Project:
- Head over to Google Cloud Console
- Click “New Project” in the top dropdown
- Name it something memorable (I called mine “CLI-Assistant”)
- Click Create
Enable the APIs:
You need to enable these APIs for your project:
- Go to “APIs & Services” > “Library”
- Search and enable each of these:
- Gmail API
- Google Drive API
- Google Calendar API
- Google Docs API (optional but recommended)
- Google Sheets API (optional but recommended)
Generate Your Gemini API Key:
- In the Cloud Console, go to “APIs & Services” > “Credentials”
- Click “Create Credentials” > “API Key”
- Copy this key somewhere safe (you’ll need it multiple times)
- (Optional but recommended) Click “Restrict Key” and limit it to only the APIs you enabled
Pro tip: Keep this key private. Like, seriously private.
Step 3: Create Your Google Apps Script
Time to build the brain of the operation.
Set Up the Project:
- Go to script.google.com
- Click “New Project”
- Name it something like “MCP Server for CLI”
Write the Code.gs File:
Delete the default code and paste this:
const apiKey = "YOUR_GEMINI_API_KEY_HERE";

const doPost = (e) => main(e);

function main(eventObject) {
  const m = ToolsForMCPServer;
  m.apiKey = apiKey;

  // Enable the tools you want to use
  // Play around with these flags
  m.enableBaseTools = true;
  m.enableClassroomTools = false;
  m.enablePeopleTools = false;
  m.enableAnalyticsTools = false;
  m.enableMapsTools = false;

  const object = { eventObject, items: m.getServer() };
  return new MCPApp.mcpApp({ accessKey: "sample" })
    .setServices({ lock: LockService.getScriptLock() })
    .server(object);
}
Replace YOUR_GEMINI_API_KEY_HERE with the API key you generated earlier.
About those flags:
-
enableBaseTools: This is the core. Gmail, Drive, Calendar. Keep thistrue. - The others are specialized. Enable them if you need Classroom, Analytics, or Maps integration.
Create the appsscript.json File:
This is where permissions live. It’s critical.
- In your Apps Script project, click “Project Settings” (gear icon)
- Check “Show ‘appsscript.json’ manifest file in editor”
- Go back to the editor, you’ll see
appsscript.jsonappear - Replace its contents with this:
{
  "timeZone": "YOUR_TIMEZONE_HERE",  // e.g., America/Los_Angeles
  "exceptionLogging": "STACKDRIVER",
  "runtimeVersion": "V8",
  "dependencies": {
    "enabledAdvancedServices": [
      {
        "userSymbol": "Drive",
        "serviceId": "drive",
        "version": "v3"
      },
      {
        "userSymbol": "Gmail",
        "version": "v1",
        "serviceId": "gmail"
      },
      {
        "userSymbol": "Calendar",
        "version": "v3",
        "serviceId": "calendar"
      }
    ],
    "libraries": [
      {
        "userSymbol": "MCPApp",
        "libraryId": "1TlX_L9COAriBlAYvrMLiRFQ5WVf1n0jChB6zHamq2TNwuSbVlI5sBUzh",
        "version": "18"
      },
      {
        "userSymbol": "ToolsForMCPServer",
        "libraryId": "1lnE7UL1jQgPDbTB9yjhiwZM0SaS9MObhzvWUWb_t8FisO6A3bLepvM2j",
        "version": "39"
      }
    ]
  },
  "webapp": {
    "executeAs": "USER_DEPLOYING",
    "access": "ANYONE_ANONYMOUS"
  },
  "oauthScopes": [
    "https://www.googleapis.com/auth/gmail.modify",
    "https://www.googleapis.com/auth/gmail.send",
    "https://www.googleapis.com/auth/drive",
    "https://www.googleapis.com/auth/drive.file",
    "https://www.googleapis.com/auth/calendar",
    "https://www.googleapis.com/auth/calendar.events",
    "https://www.googleapis.com/auth/spreadsheets",
    "https://www.googleapis.com/auth/documents",
    "https://www.googleapis.com/auth/presentations",
    "https://www.googleapis.com/auth/forms",
    "https://www.googleapis.com/auth/script.external_request"
  ]
}
Important notes:
- Change
timeZoneto your timezone - The
oauthScopesare the permissions. This setup requests access to Gmail, Drive, Calendar, Docs, Sheets, etc. - The libraries (
MCPAppandToolsForMCPServer) are essential. Don’t change these IDs.
Save everything (Ctrl+S or Cmd+S).
Step 4: Deploy Your Script
This is where your code becomes accessible.
- In Apps Script, click “Deploy” > “New deployment”
- Click the gear icon next to “Select type”
- Choose “Web app”
- Fill in the details:
- Description: “MCP Server v1” (or whatever you want)
- Execute as: “Me”
- Who has access: “Anyone”
- Click “Deploy”
-
Authorize the app (Google will ask you to review permissions)
- Click “Review Permissions”
- Choose your Google account
- Click “Advanced” (if it says the app is unverified)
- Click “Go to your project name“
- Click “Allow”
- Copy the Web App URL that appears. It looks like:
https://script.google.com/macros/s/SOME_LONG_ID/exec
Keep this URL handy. You’re almost there.
Step 5: Configure Gemini CLI to Use Your MCP Server
Now we connect everything together.
Initialize Gemini CLI:
Open your terminal and run:
gemini config
Follow the prompts to set up your Gemini API key if you haven’t already.
Add the MCP Server:
Run:
gemini
Once Gemini CLI starts, type:
/mcp
This opens the MCP configuration menu. Follow the interactive prompts:
- Choose “Add new MCP server”
- Enter a name:
google-services(or whatever you prefer) - Paste your Web App URL from Step 4
- Confirm the configuration
Test the Connection:
Try a simple command:
Check my latest emails
Or:
What's on my calendar today?
If it works, you’ll see Gemini accessing your Google services and returning results. If not, double-check:
- Your API key is correct in Code.gs
- The Web App URL is correct
- You authorized the script properly
Step 6: Start Living in the Future
You’re done. Seriously. Now you can:
Send Emails:
Send an email to john@example.com with subject "Meeting Tomorrow" and body "Hey John, are we still on for 3pm?"
Schedule Meetings:
Create a calendar event for tomorrow at 2pm titled "Team Standup"
Search Gmail:
Find all emails from boss@company.com from last week
Upload to Drive:
Upload document.pdf to my Google Drive
And So Much More
The possibilities are endless. The more you use it, the more you’ll discover what’s possible.
Pro Tips and Troubleshooting
Common Issues:
“Permission denied” errors:
- Go back to your Apps Script and re-deploy with fresh permissions
- Make sure all APIs are enabled in Google Cloud Console
“Version mismatch” errors:
- Confirm you’re using gemini-cli version 0.1.12
- Uninstall and reinstall if needed:
npm uninstall -g @google/generative-ai-cli && npm install -g @google/generative-ai-cli@0.1.12
MCP server not responding:
- Check your Web App URL is correct
- Make sure the deployment is set to “Anyone” access
- Verify your API key is valid
Make It Better:
- Customize the flags in Code.gs based on what you actually use
- Add more oauth scopes if you need access to other Google services
- Create aliases in your shell for common commands
- Experiment with different prompts to see what works best
The Real Impact
Here’s what changed for me after setting this up:
- I send emails 5x faster
- Scheduling meetings takes seconds instead of minutes
- I never lose track of files because I can search Drive from anywhere
- My workflow is completely keyboard-driven (no more mouse clicking through UIs)
It’s not just about speed. It’s about staying in flow. When you can do everything from the terminal, you’re not context-switching. Your brain stays focused. That’s the real productivity boost.
What’s Next?
Want me to dive deeper into:
- Custom automation workflows with this setup?
- Advanced MCP server configurations?
- Integrating other services beyond Google?
Drop a comment and let me know what you want to see next.
Let’s Connect
I’m Prayush Adhikari, computer engineering student and productivity nerd. I’m documenting my journey of building systems that actually work.
If this guide helped you (or if you got stuck somewhere), let’s connect:
Drop a comment below with:
- Which part of the setup you found most useful
- What you’re automating first
- What guide you want next
Thanks for reading! Now go build something that makes your life easier.
P.S. If you’re stuck on any step, drop a comment. I read and respond to everything.


