Table of Contents
Prerequisites
Make sure you have the following installed:
Step 1: Create a Simple Dockerfile and Shell Script
Create a new directory, then inside it:

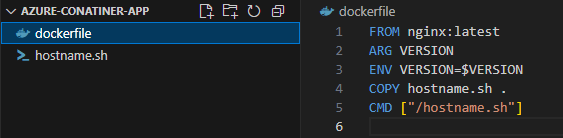
This is a minimal Dockerfile using the nginx base image and a custom shell script.
FROM nginx:latest
This tells Docker to use the latest version of the official nginx image from Docker Hub as the base image.
- The base image already includes Nginx installed and configured.
- It’s lightweight and typically used for serving web content.
ARG VERSION
This declares a build-time argument named VERSION.
-
ARGis only available during the image build process. - You can pass it using
-build-arglike this:
docker build –build-arg VERSION=1.2.3
### ENV VERSION=$VERSION
This sets an environment variable inside the container using the value passed during build time.
-
ENVis available at runtime — your script or Nginx can access it. - You can verify it with:
echo $VERSION
COPY hostname.sh .
This copies the hostname.sh script from your local directory into the image’s working directory (which is / by default unless changed).
- If you want it in a specific directory like
/usr/local/bin, you should write:
COPY hostname.sh /usr/local/bin/
CMD ["/hostname.sh"]
This sets the default command that runs when the container starts.
- It overrides Nginx’s default command.
- So instead of starting Nginx, the container will run the
hostname.shscript.
Note If the script isn’t executable or doesn’t start with a shebang (#!/bin/bash or similar), the container will fail.
This Dockerfile creates a container that:
- Uses the latest Nginx image.
- Accepts a version number at build time.
- Sets that version as an environment variable.
- Copies a script called
hostname.shinto the container. - Runs that script instead of Nginx when the container starts
Script Breakdown: hostname.sh

#!/bin/sh
- This line tells the system to use the
shshell to run the script.
HOSTNAME=\hostname“
- Runs the
hostnamecommand, capturing the machine/container name. - Stores it in the variable
HOSTNAME.
VERSION=${VERSION:-v1}
- Reads the
VERSIONenvironment variable if it’s set. - If not, it defaults to
v1.
Creates a landing HTML page for the root of the Nginx server:
cat > /usr/share/nginx/html/index.html <
…
EOF
- This file will be served when someone visits
/in the browser. - It includes:
- Writes an HTML file directly to the default Nginx directory.
- The hostname (of the container or VM)
- The version number
mkdir /usr/share/nginx/html/healthz /usr/share/nginx/html/hostname /usr/share/nginx/html/version
- Creates 3 subdirectories inside Nginx’s web root:
-
/healthz– for liveness/readiness checks -
/hostname– for showing the container’s hostname and version -
/version– for showing the version only
-
Writes mini HTML/text responses to each endpoint:
cat > /usr/share/nginx/html/hostname/index.html <
$HOSTNAME — $VERSION
EOF
- Shows:
hostname -- version - Endpoint:
/hostname
cat > /usr/share/nginx/html/version/index.html <
$VERSION
EOF
- Endpoint:
/version - Shows: version only
chmod 777 /usr/share/nginx/html/healthz
cat > /usr/share/nginx/html/healthz/index.html <
healthy
EOF
- Grants all permissions to
/healthzdirectory (not ideal for production, but okay for dev/demo). - Writes a file that says
healthyto/healthz/index.html - This is useful for Kubernetes or Docker health checks.
nginx -g "daemon off;"
- Starts Nginx in foreground mode (so the container doesn’t exit).
- This is required in Docker — if the main process exits, the container stops.
When this script runs inside a Docker container, it:

If you access the container in a browser (or curl):
-
/→ HTML page showing the hostname and version -
/healthz→ returnshealthy -
/hostname→ returnshostname -- version -
/version→ returns the version string
Step 2: Build the Docker Image
Open PowerShell in the folder and run:

Output


Step 3: Set Up Azure Container Registry
In the Azure Portal:
- Search for Container Registry
- Click Create
- Choose a name (mine was
hostcr) - Set the resource group, region, SKU, etc.
- Enable Admin User under Access Keys after creation


Step 4: Push Docker Image to ACR
1.Authenticate with Azure:

- Tag Your Docker Image

- Log in to ACR

Output

- Push the Image to ACR

Output

boops-I lost my screenshot of the Azure intercae for this
Step 5: Deploy to Azure Container Instances
- In the Azure portal, search for Container Instances
- Click Create
- Fill in:
- Name
- Resource Group
- Image source: Azure Container Registry
- Image:
hostcr.azurecr.io/hostname:v1
- Review and create


Common Errors and Fixes
❌ docker push returns “authentication required”
Fix: Make sure you’re logged into ACR:

❌ az login fails due to tenant mismatch
Fix: Use the right tenant ID explicitly:

✅ Final Checks
- Go to your deployed Container Instance
- Copy the public IP
- Visit in browser:

You should see HTML responses with hostname, version, and health check status.