A bite‑sized lab that shows exactly how subnets, availability zones, and security groups work together—while you launch a real web server the right way.
Terminology note: In AWS these are called Security Groups (SGs). “Network Security Group (NSG)” is the Azure term. We’ll use SG below.
What you’ll build
A public Nginx web server on Amazon EC2 placed in a specific Availability Zone (AZ) and subnet, protected by a tight Security Group. You’ll prove that SG rules directly control access by toggling HTTP.
Mini-architecture
Internet ↔ Internet Gateway ↔ [VPC]
↳ [Public Subnet in AZ e.g., us-east-1a]
↳ EC2 instance (public IPv4)
↳ Security Group: allow SSH(22 from My IP), HTTP(80 from world)
Step 0 — Plan your placement (Region, AZ, Subnet)
Why this matters: Subnets live inside one Availability Zone. Picking a subnet implicitly picks the AZ. You cannot move an instance to another AZ after launch.
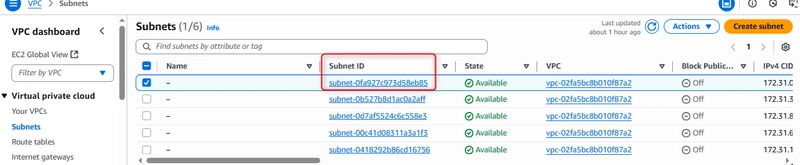
In the AWS Console, go to VPC → Subnets. Identify a public subnet in your target AZ (e.g., us-east-1a).
Verify it’s public:
Route Table has a route to 0.0.0.0/0 via an Internet Gateway (igw-xxxx).
Subnet attributes → Auto-assign public IPv4 is Enabled (or you’ll attach an Elastic IP later).
Note the Subnet ID (e.g., subnet-0abc…) and AZ (e.g., us-east-1a). You’ll select this during EC2 launch.

If you don’t have a public subnet: Create a VPC, attach an Internet Gateway, create a public subnet in your chosen AZ, and update the Route Table with a 0.0.0.0/0 → igw-xxxx route. Then enable auto-assign public IPv4 on that subnet.
Step 1 — Create a tight Security Group (SG)
A Security Group is a stateful virtual firewall for your instance.
Go to EC2 → Network & Security → Security Groups → Create security group.


Name: ec2-nginx-sg
VPC: choose the VPC that contains your target subnet.

Inbound rules:
SSH (22): Source My IP (recommended).
HTTP (80): Source 0.0.0.0/0 (and add ::/0 if you use IPv6).

Outbound rules: leave default All traffic → 0.0.0.0/0 (needed for package installs).


Step 2 — Launch the EC2 instance in your chosen subnet/AZ
EC2 → Instances → Launch instances.

Name: nginx-lab.
AMI: Choose Ubuntu 22.04 (user: ubuntu) or Amazon Linux 2023/2 (user: ec2-user).

Instance type: t2.micro/t3.micro (Free Tier eligible where available).
Key pair: Create or select an existing .pem key. Download and store safely.
Network settings:
VPC: the VPC from Step 0.
Subnet: pick the exact public subnet in the AZ you planned (e.g., the one in us-east-1a).
Auto-assign public IP: Enable (or plan to attach an Elastic IP after launch).
Firewall (security groups): Select existing → choose ec2-nginx-sg.
Storage: accept defaults.
Launch.

Step 3 — Connect via SSH
From your local terminal (Git Bash on Windows, Terminal on macOS/Linux):
chmod 400 my-key.pem
For Ubuntu AMI
ssh -i “my-key.pem” ubuntu@

Step 4 — Install and run Nginx
sudo apt update && sudo apt install nginx -y


Start and enable the service:
sudo systemctl start nginx
sudo systemctl enable nginx

Step 5 — Test HTTP
Copy the instance Public IPv4 address (or Public DNS).
Visit http:// in your browser—you should see the Nginx welcome page.

Step 6 — Prove SGs control access
In the AWS Console, open the instance’s SG ec2-nginx-sg.


Delete/disable the HTTP (80) inbound rule.

Refresh your browser—the page should stop loading (connection refused/timeout).

Re-add HTTP (80) to restore access.
Optional hardening & improvements
Least privilege SSH: lock SSH to My IP only; consider Session Manager to avoid SSH exposure entirely.
Static IP: allocate and attach an Elastic IP.
HTTPS: add a Load Balancer + ACM certificate, or use Let’s Encrypt on the instance.
Automation: recreate all of this with Terraform or Ansible.
NACLs vs SGs: Network ACLs are stateless, apply at subnet level; SGs are stateful, apply at ENI/instance level—start with SGs.
Common gotchas
Picking the wrong subnet (private/no IGW route) → no SSH/HTTP from the internet.
No public IPv4 (auto-assign disabled and no EIP) → can’t reach the instance publicly.
Using the wrong SSH username (ubuntu vs ec2-user).
Local firewall/ISP blocking outbound 22.
Clean up
Terminate the instance when done.
Release the Elastic IP (if used).
Remove unused SGs and key pairs.