Previously, we set up the foundational elements for our world, including a lobby where players spawn and a basic game area for our future maze. In this part, we’ll focus on implementing the core server-side logic for both the players and game controllers. We’ll handle player state management, allow players to press a button to enter the game area, and introduce a finish line. When a player reaches the finish line, they’ll be returned to the lobby, completing the game cycle.
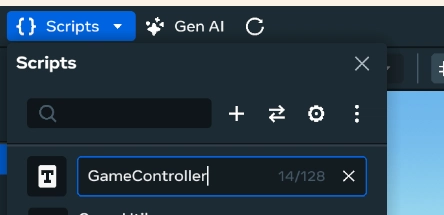
So lets continue, first we need to create a new script for our game controller. To do this use the scripts dropdown and create a new script, name this script GameController.

Then if you open the script you should see the following boilerplate code:
import * as hz from 'horizon/core';

class GameController extends hz.Component<typeof GameController> {
    static propsDefinition = {};

    start() {

    }
}
hz.Component.register(GameController);
Before we extend our GameController class lets first define some common constants we will need inside of our GameUtils script we created in our player management tutorial series. First before the Events declaration, define the following Enum which will contain the different states of our game:
export enum GameState {
    'Loading',
    'Ready',
    'Starting',
    'Playing',
    'Ending',
    'Finished',
}
Additionally we need to define a new type so that we can optionally pass a player in our events and define optional properties in our controllers.
export type OptionalPlayer = hz.Player | undefined;
Finally extend the Events definition with the following two events:
    setGameState: new hz.LocalEvent<{ state: GameState, winner: OptionalPlayer }>('setGameState'),
    gameStateChanged: new hz.LocalEvent<{ fromState: GameState, toState: GameState }>('gameStateChanged'),
Now return to the GameController.ts file and import the necessary types and events:
import { Events, GameState, OptionalPlayer } from 'GameUtils';
Next we need to define some additional properties for our GameController class. These properties will help us manage the game state and player interactions more effectively. Add the following code inside the GameController class after the propsDefinition.
    private gameState: GameState = GameState.Loading;
    private timerID: number = 0;
    private countdownTimeInMS: number = 10000;
    private winner: OptionalPlayer = undefined;
    private lastGameStartTime: number = 0;
    private lastGameEndTime: number = 0;
What we have done here is defined the necessary properties to manage the game state, track the timing of the game, and identify the winner and how long it has taken them to complete the maze. Next inside of the start function, we need to initialise the game and set up the necessary event listener. Update that function to the following:
    start() {
        this.connectLocalBroadcastEvent(Events.setGameState, (data: { state: GameState, winner: OptionalPlayer }) => {
            this.setGameState(data.state, data.winner);
        });
    }
Here, we’ve set up a listener for the setGameState event. When this event is triggered, it receives the relevant data and calls the setGameState function, which we’ll implement in the next step.
Next, add a setGameState function below the start function. This function will use a switch statement to manage the various game states. Update your controller with the following code:
    setGameState(state: GameState, winner: OptionalPlayer): void {
        const previousState = this.gameState;
        switch (state) {
            case GameState.Ready:
                this.gameState = GameState.Ready;
                break;
            case GameState.Starting:
                this.gameState = GameState.Starting;
                this.handleNewMatchStarting();
                break;
            case GameState.Playing:
                this.lastGameStartTime = Date.now();
                this.gameState = GameState.Playing;
                break;
            case GameState.Ending:
                if (this.gameState === GameState.Ending || this.gameState === GameState.Finished) return; // Prevent multiple calls to handleMatchEnding
                this.gameState = GameState.Ending;
                this.winner = winner;
                this.lastGameEndTime = Date.now();
                this.handleMatchEnding();
                break;
            case GameState.Finished:
                this.gameState = GameState.Finished;
                break;
        }

        if (this.gameState !== previousState) {
            this.sendLocalBroadcastEvent(Events.gameStateChanged, {
                fromState: previousState,
                toState: this.gameState
            });
        }

        if (this.gameState === GameState.Finished) {
            this.setGameState(GameState.Ready, undefined);
        }
    }
The setGameState function is responsible for handling all game state transitions and coordinating the game flow. Whenever a state change is required, this function ensures the appropriate actions are performed for each state. Within the switch statement, the functions handleNewMatchStarting and handleMatchEnding are called to encapsulate the logic for starting and ending matches, keeping the code modular and maintainable. After processing the state change, the function checks if the game state has actually changed; if so, it broadcasts the gameStateChanged event to notify other scripts. Additionally, when the game reaches the Finished state, the function automatically transitions the game back to the Ready state, preparing it for the next round.
Next, let’s implement the handleNewMatchStarting and handleMatchEnding functions to manage the game flow. We’ll start with handleNewMatchStarting. This function will set up a countdown timer (starting from 10 seconds) that displays a popup to all players. When the countdown reaches zero, a Playing state will be broadcasted via the setGameState event, and the timer is reset:
    private handleNewMatchStarting(): void {
        this.timerID = this.async.setInterval(() => {
            if(this.countdownTimeInMS > 0) {
                this.world.ui.showPopupForEveryone(
                    `Match Starts in  ${this.countdownTimeInMS / 1000}`,
                    1,
                );
                this.countdownTimeInMS -= 1000; // decrement the countdown by 1 second
            } else {
                if (this.timerID !== 0) {
                    this.async.clearInterval(this.timerID);
                    this.timerID = 0;
                    this.sendLocalBroadcastEvent(Events.setGameState, {
                        state: GameState.Playing,
                        winner: undefined
                    });
                    this.countdownTimeInMS = 10000; // reset the initial countdown value
                }
            }
        }, 1000);
    }
Now add the handleMatchEnding function. This function will display the game winner to all players via a global popup. After a 10 second countdown, a setGameState event will be broadcasted to transition the game to the Finished state. This function will also handle the updating of the leaderboard.
    private handleMatchEnding(): void {
        this.countdownTimeInMS = 7000;
        let text = '';
        if (this.winner) {
            text = 'Winner: ' + this.winner.name.get();
            this.world.leaderboards.setScoreForPlayer('Fastest Times', this.winner, Math.floor((this.lastGameEndTime - this.lastGameStartTime) / 1000), false);
        } else {
            text = 'Winner: No one';
        }
        this.timerID = this.async.setInterval(() => {
            if (this.countdownTimeInMS > 0) {
                this.world.ui.showPopupForEveryone(
                    text,
                    1,
                );
                this.countdownTimeInMS -= 1000; // decrement the countdown by 1 second
            } else {
                if (this.timerID !== 0) {
                    this.async.clearInterval(this.timerID);
                    this.timerID = 0;
                    this.sendLocalBroadcastEvent(Events.setGameState, {
                        state: GameState.Finished,
                        winner: undefined
                    });
                    this.countdownTimeInMS = 10000; // reset the initial countdown value
                }
            }
        }, 1000);
    }
The code is relatively straightforward. It first checks if we have a defined winner, if we do then it uses the lastGameEndTime and lastGameStartTime properties to calculate the time it took to complete the maze and updates the leaderboard. It then sets up a countdown timer that displays a popup message to all players for 10 seconds. When the countdown reaches zero, the game state is updated accordingly, and the timer is reset for its next use. The use of async.setInterval and async.clearInterval ensures that the timer runs smoothly without blocking the main game loop.
Finally we need to connect the game controller to our world, create an empty object and attach the script to it.

Now with this code in place, we have the basic game controller with state management ready but not connected yet. Next, we need to create the logic needed to start our game. In the first part of this tutorial series we added a button and a trigger, we will use this trigger to go from the Ready state to the Starting state. To do this we need to first create a new script called StartButton. In the Desktop Editor create a new script and then open it in your code editor. You should see the following skeleton code:
import * as hz from 'horizon/core';

class StartButton extends hz.Component<typeof StartButton> {
    static propsDefinition = {};

    start() {

    }
}
hz.Component.register(StartButton);
Update this code by first importing Events and GameState from GameUtils.
import { Events, GameState } from 'GameUtils';
Now, let’s extend propsDefinition with startButton, startText, loadingText, playingText, generationText, and helpText. These will allow us to reference the relevant entities in our world when attaching the script, we will define the hidden and visible positions for the moving button. We’ll also set up default text values for the text gizmo display, which will be updated based on the current game state.
    static propsDefinition = {
        startButton: { type: hz.PropTypes.Entity },
        startText: { type: hz.PropTypes.Entity },
        loadingText: { type: hz.PropTypes.String, default: "Loading the game..." },
        playingText: { type: hz.PropTypes.String, default: "Game currently in play please wait!" },
        generationText: { type: hz.PropTypes.String, default: "Generating Random Maze..." },
        helpText: { type: hz.PropTypes.String, default: "Press the button to start the game" },
        hiddenPosition: { type: hz.PropTypes.Vec3 },
        visiblePosition: { type: hz.PropTypes.Vec3 },
    };
Beneath the propsDefinition, we need to define a few more properties to handle the button being pressed and to store a reference to our text gizmo so we can update it efficiently. Add the following definitions:
    private buttonPressed: boolean = true;
    private startGizmo: hz.TextGizmo | undefined;
These properties will help us manage the button’s state, its position when visible or hidden, and a reference to the text gizmo for displaying messages to players.
We will now need to implement a preStart function. This function will run when the script is first run on server startup and allows us to instantiate our startGizmo property and setup the listener for the gameStateChanged event. Inside the event listener callback we will update the text gizmo and button position based on the game state. When Ready we will set the startGizmo text to the helpText and move the button to the visiblePosition, disabling buttonPressed to ensure any active players can start the next round. If the state is Playing, we will hide the button and update the text to PlayingText. Above the start function, add the following:
    preStart () {
        this.startGizmo = this.props.startText?.as(hz.TextGizmo);
        this.startGizmo?.text.set(this.props.loadingText);
        this.connectLocalBroadcastEvent(
            Events.gameStateChanged,
            (data: { fromState: GameState, toState: GameState }) => {
                if (data.toState === GameState.Ready) {
                    this.startGizmo?.text.set(this.props.helpText);
                    this.buttonPressed = false;
                    this.props.startButton?.position.set(this.props.visiblePosition);
                } else if (data.toState === GameState.Playing) {
                    this.props.startButton?.position.set(this.props.hiddenPosition);
                    this.startGizmo?.text.set(this.props.playingText);
                }
            }
        );
    }
As you can see we first instantiate the startGizmo property by casting the prop definition entity to a TextGizmo and then use connectLocalBroadcastEvent to listen for changes in the game state and update the the relevant properties accordingly.
With that in place we can now move onto implementing the start function for our StartButton script. Our script will be attached to the trigger we created in the previous tutorial, this gives us access to an event that is triggered when a player enters the trigger zone. We will use this event to handle the button press in a separate function we will define after. Extend the predefined start function with the following code:
    start() {
        this.connectCodeBlockEvent(
            this.entity,
            hz.CodeBlockEvents.OnPlayerEnterTrigger,
            (player: hz.Player) => {
                this.handleOnPlayerPressButton(player)
            }
        );
    }
We use the OnPlayerEnterTrigger event to detect when a player enters the trigger zone and call the yet to be defined handleOnPlayerPressButton function to handle the button press logic.
Now to implement handleOnPlayerPressButton, inside this function we will first check if the button has already been pressed, if it has we will return early. Else we will set the button to be pressed, update the position of the button to it’s hidden/pressed position, update the startGizmo with the generationText message and finally send an setGameState event to change the game state to Starting. After the start function add the following code:
    private handleOnPlayerPressButton(player: hz.Player): void {
        if (this.buttonPressed) return;
        this.buttonPressed = true;
        this.props.startButton?.position.set(this.props.hiddenPosition);
        this.startGizmo?.text.set(this.props.generationText);
        this.sendLocalBroadcastEvent(Events.setGameState, { state: GameState.Starting, winner: undefined });
    }
Save the file, and then return to the desktop editor. Attach the script to the trigger object using the properties panel. Once attached set the relevant properties for the script to function correctly. Set the startButton property to the moving button object, set the startText property to the text gizmo object. Set the visiblePosition to be the current position of the button and then set the hiddenPosition to be a position below the button so that it becomes less visible to players.

Now if we enter preview mode, we will see the text ‘loading the game…’ appear but the button is not able to be pressed.

Currently, the game remains in the Loading state, which is intended for use while maze components are being generated. However, since that functionality is not yet implemented, we need to transition to the Ready state so the button can be pressed. As a temporary solution, update the GameController by adding the following line at the end of the start function to set the game state to Ready when the world is initialized.
this.setGameState(GameState.Ready, undefined);
Save the file, allow the scripts to compile and re-enter your preview mode. Hopefully now you will be able to press the button and on pressing a button the 10 second countdown timer will start. You should see the text change from ‘press the button to start’ to ‘Generating random maze…’ and then ‘Game currently in play please wait!’ once the countdown is complete. Your avatar will not yet spawn into the game area, we will implement the logic needed for that next.

To create the logic needed to spawn the player into the game area we will first need to create a new spawn point using a gizmo in the desktop editor. Once you have added the spawn point to the world position it in the south west corner of the game area at position hz.Vec3(32,1,-32). We leave some spacing either side as these will be solid walls when we eventually render the maze. Remember to disable the Spawn on start option in the properties.


With that created we need to think about how we will spawn the players once the countdown is complete. To do this we will extend the PlayerController that we created in the Player Management tutorial. First open this script an refamilarise yourself with the logic. Once you have done that extend the import statement to include GameState.
import { GameState, Events } from 'GameUtils';
Then we need to link the spawn point we just created to the script, you can do this by extending the propsDefinition object with a property called playSpawnPoint, while you are doing this also add a property for the lobbySpawnPoint.
    playSpawnPoint: { type: hz.PropTypes.Entity },
    lobbySpawnPoint: { type: hz.PropTypes.Entity },
Return to the desktop editor and assign the spawn point gizmos to the playSpawnPoint and lobbySpawnPoint properties.

With that linked we need to also add a new property that we will use to store a reference to the players currently playing the game round, after the existing players property definition add the following:
private matchPlayers = new Array<hz.Player>();
Next extend the existing preStart function by connecting to the gameStateChanged event calling a yet to be defined handleGameStateChanged function.
    this.connectLocalBroadcastEvent(
        Events.gameStateChanged,
        (data: {
            fromState: GameState,
            toState: GameState,
        }) => this.handleGameStateChanged(data.fromState, data.toState),
    );
Then to implement the handleGameStateChanged function to handle the state transitions. This will again just be a simple switch statement which will call appropriately named functions which we will define after.
    private handleGameStateChanged(fromState: GameState, toState: GameState) {
        switch (toState) {
            case GameState.Playing:
                this.moveAllLobbyPlayersToMatch();
                break;
            case GameState.Finished:
                this.moveAllMatchPlayersToLobby();
                break;
            default:
                break;
        }
    }
So we only really care about two statuses in the player controller: Playing and Finished. When transitioning to Playing, we need to move all players from the lobby to the match. When transitioning to Finished, we need to move all players from the match back to the lobby. Let’s implement the moveAllLobbyPlayersToMatch first.
    private moveAllLobbyPlayersToMatch() {
        this.matchPlayers = new Array<hz.Player>();
        let spawnPoint = this.props.playSpawnPoint?.as(hz.SpawnPointGizmo);
        this.players.forEach((p: hz.Player) => {
            this.matchPlayers.push(p);
            spawnPoint?.teleportPlayer(p);
        });
    }
This function initialises the matchPlayers array to ensure it’s empty before adding players. It retrieves the spawn point entity and casts it to a SpawnPointGizmo. Then, it iterates over all players currently in the lobby (stored in the players array), adds each player to the matchPlayers array, and teleports them to the designated spawn point in the game area.
Then before we test the code just quickly write the moveAllMatchPlayersToLobby function.
    private moveAllMatchPlayersToLobby() {
        let spawnPoint = this.props.lobbySpawnPoint?.as(hz.SpawnPointGizmo);
        this.players.forEach((p: hz.Player) => {
            if (this.matchPlayers.includes(p)) {
                spawnPoint?.teleportPlayer(p);
            }
        });
    }
In this function we iterate the players array and check if each player is in the matchPlayers array. If they are, we teleport them to the lobby spawn point. This effectively moves all players back to the lobby when the match is finished and will not error if a player left the game early.
Now you should be able to test and once the countdown reaches zero, the game state should transition from Starting to Playing, triggering the appropriate spawn into the game area.
Next we need to go from Playing to Ending once the match is over. To achieve this we will need to add a finish point to our maze. We will do this by creating a trigger zone at the end of the maze that will detect when players reach it. To make this ending slightly more interesting we can add a text gizmo that displays a “Finish” message when players arrive at the finish point and a star.
Return to the desktop editor and add a new trigger gizmo, position this at the north eastern corner of the maze, in this example that is hz.Vec3(-32,5,32) and set the scale to hz.Vec3(4,10,4).


Next add the star, search in the public assets panel for “Star – Gold” and place it within the trigger gizmo.


Finally add a text gizmo to display the “Finish” message, position this above your star.


With these objects in place, group them together to keep your hierarchy organised, name the new object Finish.

For the trigger zone to work we must create a script, in the editor create a new script called Finish and attach it to the FinishTrigger object. This script will handle the logic for detecting when players enter the finish zone and transitioning the game state to Ending.

Open the script and you should see the following boilerplate code:
import * as hz from 'horizon/core';

class Finish extends hz.Component<typeof Finish> {
    static propsDefinition = {};

    start() {

    }
}
hz.Component.register(Finish);
To begin, import the GameState enum and the Events object from your GameUtils module:
import { GameState, Events } from 'GameUtils';
Then, within the start function, you can add an event listener for when players enter the finish trigger. In the callback to this event we will broadcast the game state change to Ending, passing the player who triggered the event as the winner. We already have logic in our controller to defend against a game having multiple winners so we can safely assume that the first player to trigger the event is the only winner.
    start() {
        this.connectCodeBlockEvent(
            this.entity,
            hz.CodeBlockEvents.OnPlayerEnterTrigger,
            (player: hz.Player) => {
                this.sendLocalBroadcastEvent(Events.setGameState, { state: GameState.Ending, winner: player });
            }
        );
    }
Now save the file and return to the editor. You should now be able to test the finish trigger by playing the game and reaching the end of the maze. When a player enters the finish trigger, the game state should change to Ending, and your player should be declared the winner via the global popup. After 10 seconds you should see the game transition to the Finished state, and your player should be returned to the lobby.
Finally to finish up, move the GameSpawnPoint and Finish objects into the GameArea hierarchy

This concludes this tutorial, in the next part we will extend the HUD with a timer and add sound to enhance the gameplay experience.