When it comes to coffee, everyone has their preferences. I usually prefer smooth, naturally sweet coffee with nice fragrance – no bitter or smoky flavours.
There is a challenge though: achieving that perfect roast at home requires split-second timing. Miss the “first crack” by 30 seconds? You’ve got bitter, over-roasted beans. Finish the roast early? Enjoy your grassy / earthy tasting coffee.
This post is about teaching a neural network to detect that critical moment from audio alone.
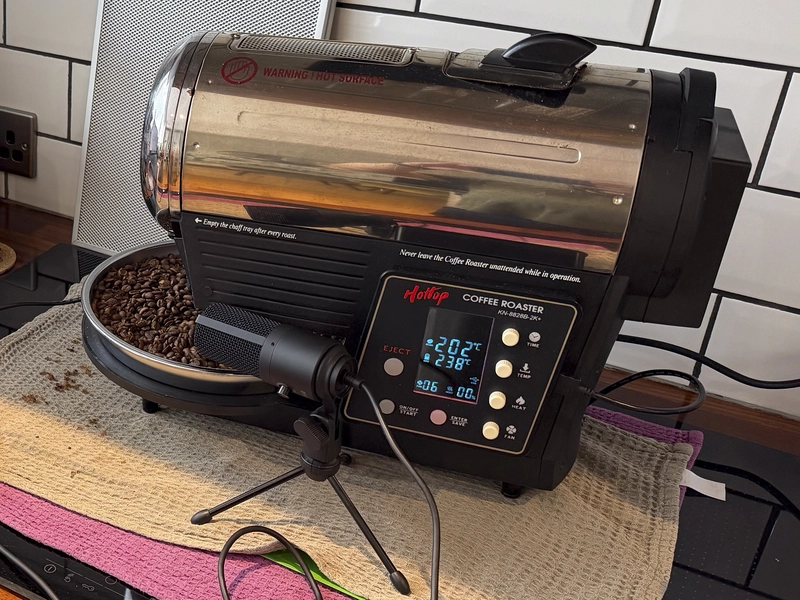
While home roasting has been niche, over the recent years there are more options available for roasting coffee at home. These devices usually have smaller capacity ~ 250 / 500g and compact and lightweight enough to run over a counter.
To achieve my desired roast level I generally aim for a light / medium roast which requires development phase to be about 10% – 15% of the roast time. Development phase is the duration from the first crack starting until the end of roast where beans are ejected from the roaster.
First crack is the audible popping sound that occurs when coffee beans rapidly expand and release moisture and CO2 due to the buildup of internal pressure during roasting. Many light roast profiles end just after first crack begins, while medium roasts continue for 1-3 minutes beyond this point. On my setup, first crack typically begins around 170°C-180°C, and I aim to finish the roast at approximately 195°C. This gives me 1-3 minutes of development time after first crack starts. This value is based on my observations on a Hottop KN8828B-2K+ home roaster.
Detecting the First Crack event is important for the end goal as we need to adjust heat and fan from that point to slow down the roast and stretch the development phase.
The current series of posts will cover the following:
- Training a Neural Network to Detect Coffee First Crack from Audio – An Agentic Development Journey
- Part 2: Building an MCP server to control a home coffee roaster
- Part 3: Building a Coffee roasting Agent with Aspire to automate coffee roasting
I have been recording coffee roasting audio during summer and have been looking into fine-tuning an existing model to be able to train and run inference on an arm based laptop. The task is performing binary classification on an audio stream to identify either first crack happened in the sample or not. For example a common baseline benchmark is making a random choice to predict class a or b (coin toss) which makes the baseline random performance 50% for any binary classification problem when using random guessing. Our goal is to beat this with minimal data available for fine-tuning.
My initial objective has been utilising a pre-trained AST (Audio Spectrogram Transformer) model from Hugging face that was originally trained on AudioSet and fine-tuning it for first crack vs not first crack binary classification task. In this approach, the model architecture remains the same, but we are updating the weights through training on our coffee roasting audio data.
To tackle this challenge systematically, I decided to leverage modern development tools and adopted an AI-first development approach. In the next section, the details of the setup will be discussed.
📊 TL;DR
- Problem: Detect coffee “first crack” from audio to optimize roast profiles
- Solution: Fine-tune MIT’s AST model on 9 recording sessions
- Results: 93.3% accuracy, 0.986 ROC-AUC with minimal data
- Tools: Warp AI, Label Studio, PyTorch, Hugging Face
- Next: Part 2 builds MCP servers, Part 3 creates autonomous roasting agent
Why Automated First Crack Detection?
Manual first crack detection requires constant attention during a 10-12 minute roast. Environmental factors (noisy extractors, ambient sounds) can mask the cracks and pops.
This project aims to:
- Free the roaster to multitask during the roast
- Provide consistent detection regardless of ambient noise
- Enable data-driven roast profile development
- Lay groundwork for fully autonomous roasting (Part 3)
🤖 Warp AI Contributions
Throughout development, Warp’s AI agent:
- Suggested Label Studio over manual Audacity annotation
- Generated data preprocessing pipeline architecture
- Created train, test eval split logic
- Debugged overfitting with annotation strategy advice
- Auto-generated evaluation scripts
Setting Up the Development Environment with Warp
Having used Warp at work for the past few months and how it transformed my development flow, it was a natural choice for this project.
I have started with creating a readme file and shared my starting requirements and setup. I have included links to the tutorials of interest, the libraries I intend to use and the model I would like to use for fine-tuning.
Warp’s AI agent helped me structure the project, suggest tools, and iterate on the implementation approach from training scripts, evaluation to inference and manual testing scripts.
Project Evolution and Documentation
The readme above was pretty much all I shared with Warp and then asked to focus on Phase 1 and create an implementation plan for Phase 1.
I have lost the recordings I made over summer and therefore I had to start with minimal data – only 4 recording sessions ~10 minutes each. This was enough to build the initial workflow with Warp.
Data Collection Strategy
For data collection, I have used a USB microphone pointed towards the roaster and recording each roasting session. A session takes about 10 – 12 minutes. At the time of starting, I only had 4 recording sessions available.
Recordings have the following properties:
- Sample rate: 44.1kHz (recommended for compatibility)
- Format: WAV (uncompressed)
- Bit depth: 16-bit minimum
- Channels: Mono sufficient
- Recording duration: Full roast cycle (10-15 minutes)

Data Annotation and Labeling
When I started, I was intending to do manual annotation using a free and open source audio editor and recording application Audacity. However Warp agent pointed me towards Label Studio and even provided the configuration snippets and described how to use it.
With the initial 4 recordings, I have used sparse labels and proceeded to training and evaluation. This has led to overfitting and the results were not reliable.
Initial Results with Sparse Labeling
With only 4 recording sessions and sparse annotation (marking only obvious first crack events), the model showed signs of overfitting:
| Metric | Value | Issue |
|---|---|---|
| Validation Accuracy | 100% (epochs 2-7) | Perfect scores = memorisation |
| Training Accuracy | 100% (epochs 3-7) | No learning after epoch 3 |
| Test Precision | 75% | High false positive rate |
| Class Imbalance | 15% / 85% | Severe imbalance |
The problem: The model memorised the limited training data rather than learning generalisable acoustic features of first crack.
The solution: Expanding to 9 sessions with balanced annotation (equal first_crack and no_first_crack samples) dramatically improved precision from 75% → 95.2% while maintaining excellent recall.
As I had increased the recordings to 9, I spent more time annotating and aimed at building a balanced data with enough samples for first crack and no first crack. Each annotated sample was 3 – 6 seconds.

Warp has also provided the configuration snippet for Label Studio
value="Coffee Roast First Crack Detection"/>
name="instructions" value="Listen to the audio and mark regions where first crack occurs. Mark other regions as no_first_crack."/>
Data Preprocessing Pipeline
Coffee roasting is driven by many variables ranging from ambient temperature to the bean type, machine, Heating type and so on. A basic electric roaster like the one used here is slow to respond to change in controls as the heating element needs to warm up and cool down depending on the command. Accurately identifying the current phase of the roast is crucial and this can be done by audio analysis, visual, a combination of time and temperature to varying degree of success. In my manual roasts, recently I have been getting better results by adjusting the parameters once first crack is reached and therefore decided to fine tune a model to detect these.
So given we have a microphone pointing at the roaster during roasting process and a relatively controlled environment, how do we get the recording and convert it into the format needed to support our fine-tuning process.
Challenges:
- Raw audio files are captured from multiple roasting sessions of varying length.
- Additionally ~ 10 previously recorded sessions lost accidentally.
- First crack events are sparse. Happens around about 12-25% of the whole duration. And they are also not continuous.
- This leads to an imbalance in samples.
- We need a workflow and a pipeline to process these and end up with a balance dates for training evaluation and test.
- At the beginning we also have a limited number of sessions recorded (9 at the time of writing)
- Labelling should be easy and repeatable to avoid user errors.
Labelling Process
While the fine tuning approach, and the base model was instructed to Warp, Label Studio was not in the original requirements. And Warp has not only recommended using Label Studio but also provided detailed steps about running and configuring and get going. These worked out of the box.
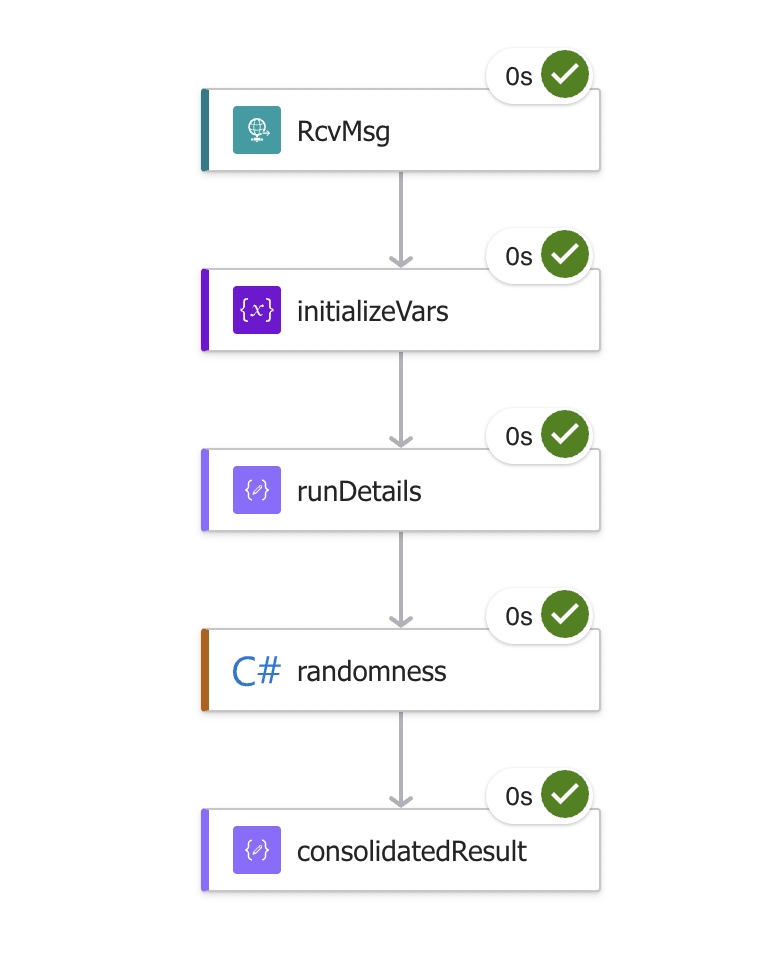
┌─────────────────────────────────────────────────────────────────┐
│                    Label Studio (Web UI)                        │
│          Manually annotate audio files                          │
│          Mark "first crack"https://dev.to/"not first crack" time regions    |
└────────────────────────┬────────────────────────────────────────┘
                         │
                         │ Export JSON
                         ▼
        📄 project-1-at-2025-10-18-20-44-9bc9cd1d.json
                         │
                         │
    ╔════════════════════▼═══════════════════════════════════════╗
    ║  STEP 1: convert_labelstudio_export.py                     ║
    ║  • Strip hash prefixes from filenames                      ║
    ║  • Compute audio durations                                 ║
    ║  • Extract labeled time regions from the raw files         ║
    ║  • Output one JSON per audio file                          ║
    ╚════════════════════╦═══════════════════════════════════════╝
                         │
                         ▼
              📁 data/labels/
              ├── roast-1.json
              ├── roast-2.json
              └── roast-3.json
                         │
                         │
    ╔════════════════════▼═══════════════════════════════════════╗
    ║  STEP 2: audio_processor.py                                ║
    ║  • Read annotation JSONs                                   ║
    ║  • Load raw audio files (44.1kHz mono)                     ║
    ║  • Extract time segments (start→end)                       ║
    ║  • Save chunks as WAV files by label                       ║
    ║  • Generate processing_summary.md                          ║
    ╚════════════════════╦═══════════════════════════════════════╝
                         │
                         ▼
              📁 data/processed/
              ├── first_crack/
              │   ├── roast-1_chunk_000.wav
              │   └── roast-1_chunk_001.wav
              └── no_first_crack/
                  ├── roast-1_chunk_002.wav
                  └── roast-2_chunk_000.wav
                         │
                         │
    ╔════════════════════▼═══════════════════════════════════════╗
    ║  STEP 3: dataset_splitter.py                               ║
    ║  • Collect all chunks by label                             ║
    ║  • Train, validation and test split                        ║
    ║    (70% train, 15% val, 15% test)                          ║
    ║  • Copy files to split directories                         ║
    ║  • Generate split_report.md                                ║
    ╚════════════════════╦═══════════════════════════════════════╝
                         │
                         ▼
              📁 data/splits/
              ├── train/     (70%)
              │   ├── first_crack/
              │   └── no_first_crack/
              ├── val/       (15%)
              │   ├── first_crack/
              │   └── no_first_crack/
              └── test/      (15%)
                  ├── first_crack/
                  └── no_first_crack/
Once the steps above are complete, we are ready for training and evaluation.
Dataset Overview
Total Samples: 298 chunks from 9 roasting sessions
Overall Class Balance
| Class | Count | Percentage | Avg Duration |
|---|---|---|---|
| first_crack | 145 | 48.7% | 4.5s |
| no_first_crack | 153 | 51.3% | 4.0s |
Split Distribution
| Split | Total Samples | first_crack | no_first_crack | Split Ratio |
|---|---|---|---|---|
| Train | 208 | 101 (48.6%) | 107 (51.4%) | 69.8% |
| Validation | 45 | 22 (48.9%) | 23 (51.1%) | 15.1% |
| Test | 45 | 22 (48.9%) | 23 (51.1%) | 15.1% |
Class Balance Across Splits
| Class | Train | Validation | Test | Total |
|---|---|---|---|---|
| first_crack | 101 | 22 | 22 | 145 |
| no_first_crack | 107 | 23 | 23 | 153 |
Per-Session Breakdown
| Recording Session | first_crack | no_first_crack | Total | Balance |
|---|---|---|---|---|
| 25-10-19_1103-costarica-hermosa-5 | 13 | 14 | 27 | 48.1% / 51.9% |
| 25-10-19_1136-brazil-1 | 19 | 19 | 38 | 50.0% / 50.0% |
| 25-10-19_1204-brazil-2 | 20 | 15 | 35 | 57.1% / 42.9% |
| 25-10-19_1236-brazil-3 | 18 | 17 | 35 | 51.4% / 48.6% |
| 25-10-19_1315-brazil4 | 15 | 14 | 29 | 51.7% / 48.3% |
| roast-1-costarica-hermosa-hp-a | 16 | 17 | 33 | 48.5% / 51.5% |
| roast-2-costarica-hermosa-hp-a | 16 | 19 | 35 | 45.7% / 54.3% |
| roast-3-costarica-hermosa-hp-a | 13 | 19 | 32 | 40.6% / 59.4% |
| roast-4-costarica-hermosa-hp-a | 15 | 19 | 34 | 44.1% / 55.9% |
Key Observations:
- Nearly balanced dataset (48.7% vs 51.3%)
- Stratified split maintains balance across train/val/test
- 9 recording sessions, mix of Costa Rica and Brazil beans
- Average chunk duration: 4.2 seconds
- Total annotated audio: ~21 minutes
Evaluation Metrics
For this binary classification task, we use multiple metrics to evaluate the model performance:
Accuracy
The proportion of correct predictions (true positives and true negatives) among all predictions.
Accuracy = (TP + TN) / (TP + TN + FP + FN)
This metric provides an overall sense of model correctness. However, accuracy alone can be misleading with imbalanced datasets.
Precision
Of all samples predicted as first_crack, what proportion actually were first crack events?
Precision = TP / (TP + FP)
High precision means fewer false alarms. Critical when we don’t want to prematurely adjust roaster settings based on incorrect detections.
Recall (Sensitivity)
Of all actual first_crack events, what proportion did the model correctly identify?
Recall = TP / (TP + FN)
High recall means we catch most first crack events. Missing first crack (false negative) is likely to result in over-roasting.
F1 Score
The harmonic mean of precision and recall, providing a single balanced metric.
F1 = 2 × (Precision × Recall) / (Precision + Recall)
Balances precision and recall. Useful when both false positives and false negatives are costly.
In case of roasting, these could mean under roasted or dark roast which is not desirable from this project perspective.
ROC-AUC (Area Under the Receiver Operating Characteristic Curve)
Measures the model’s ability to distinguish between classes across all classification thresholds.
- ROC Curve: Plots True Positive Rate (Recall) vs False Positive Rate at various thresholds
- AUC: Area under this curve (1.0 = perfect, 0.5 = random guessing)
Threshold-independent metric showing overall classification performance. Values above 0.8 indicate good discrimination.
Confusion Matrix
The confusion matrix visualises the model’s predictions versus actual labels:
                    Predicted
                    first_crack  no_first_crack
Actual  first_crack      TP            FN
        no_first_crack   FP            TN
Where:
- TP (True Positive): Correctly predicted first crack
- TN (True Negative): Correctly predicted no first crack
- FP (False Positive): Predicted first crack, but was actually no first crack (false alarm)
- FN (False Negative): Predicted no first crack, but was actually first crack (missed detection)
Training and Evaluation
With our dataset properly split and balanced and or metrics defined, we’re ready to fine-tune the Audio Spectrogram Transformer (AST) model for first crack detection.
Model Architecture
The project uses MIT’s pre-trained AST model (MIT/ast-finetuned-audioset-10-10-0.4593) from Hugging Face, which was originally trained on AudioSet. The model architecture:
- Input: Audio spectrograms (16kHz, 10-second windows)
- Architecture: Vision Transformer adapted for audio
- Transfer Learning: We keep the pre-trained weights and fine-tune for binary classification
-
Output: Two classes –
first_crackvsno_first_crack
Training Configuration
The training process uses the following configuration (defined in models/config.py):
TRAINING_CONFIG = {
    'batch_size': 8,
    'learning_rate': 1e-4,
    'num_epochs': 50,
    'device': 'mps',  # Apple Silicon GPU
    'sample_rate': 16000,
    'target_length_sec': 10.0
}
Key training features:
- Class-weighted loss: Addresses class imbalance
- AdamW optimizer: With cosine annealing learning rate schedule
- Early stopping: Based on validation F1 score
- TensorBoard logging: Real-time metrics visualization
Training Process
To start training:
./venv/bin/python src/training/train.py \
  --data-dir data/splits \
  --experiment-name baseline_v1
The training script:
- Loads train/val data using
AudioDataset(automatic resampling to 16kHz) - Applies class weights to handle imbalance
- Trains with early stopping (patience: 10 epochs)
- Saves best model based on validation F1 score
- Writes checkpoints to
experiments/runs//
Results: Exceeding Expectations
With only 9 recording sessions (~21 minutes of annotated audio):
| Metric | Baseline (Random) | Our Model | Improvement |
|---|---|---|---|
| Accuracy | 50.0% | 93.3% | +86.6% |
| Precision | 50.0% | 95.2% | +90.4% |
| Recall | 50.0% | 90.9% | +81.8% |
| F1 Score | 50.0% | 93.0% | +86.0% |
| ROC-AUC | 0.50 | 0.986 | +97.2% |
Translation: The model correctly identifies first crack 93 times out of 100,
with only 1 false alarm and 2 missed detections across the test set.
Confusion Matrix
                    Predicted
                    no_first_crack  first_crack
Actual  no_first_crack     22            1
        first_crack         2           20
This is excellent performance for a model trained on just 9 recording sessions! The higher overlap (70% vs previous experiments) likely contributed to the improved results. This demonstrates the power of transfer learning with pre-trained audio models.
Performance breakdown:
• Only 1 false alarm (FP) – down from 2
• Only 2 missed detections (FN) – same as before
• 22/23 correct no_first_crack predictions (95.7%)
• 20/22 correct first_crack predictions (90.9%)
This balanced performance is crucial for real-time roasting control where both missing first crack and triggering false adjustments have consequences.
Evaluation on Test Set
To evaluate the final model:
./venv/bin/python src/training/evaluate.py \
  --checkpoint experiments/final_model/model.pt \
  --test-dir data/splits/test
This generates:
- Classification report with per-class metrics
- Confusion matrix visualization
- ROC curve analysis
- Detailed results saved to text files
Key Learnings
What Worked:
- Transfer learning from AudioSet significantly reduced data requirements
- Balanced annotation (equal first_crack/no_first_crack samples) improved performance
- 10-second windows captured enough context for accurate detection
- Class-weighted loss handled remaining imbalance effectively
Challenges:
- Initial sparse labelling with only 4 sessions led to overfitting
- Limited training data (9 sessions) required careful annotation strategy
- Environmental noise kept to a minimum under a controlled environment
Future Improvements:
- Collect more diverse roasting sessions (different beans, temperatures, extractor configuration)
- Experiment with data augmentation (time stretching, pitch shifting)
- Test shorter inference windows for faster real-time detection
Real-Time Inference
The trained model can now detect first crack in real-time from either audio files or live microphone input:
# File-based detection
./venv/bin/python src/inference/first_crack_detector.py \
  --audio data/raw/roast-1.wav \
  --checkpoint experiments/final_model/model.pt

# Live microphone detection
./venv/bin/python src/inference/first_crack_detector.py \
  --microphone \
  --checkpoint experiments/final_model/model.pt
The detector uses sliding window inference with “pop-confirmation” logic:
- Analyzes 10-second audio windows with 70% overlap (3-second hop between windows)
- Requires minimum of 3 positive detections (pops) within a 30-second confirmation window
- Maintains detection history to filter false positives
- Returns timestamp in MM:SS format when first crack is confirmed
This forms the foundation for Part 2, where we’ll wrap this detector in an MCP server for integration with AI agents.
Real-Time Performance
Hardware: Apple M3 Max (MPS – Metal Performance Shaders)
Speed Metrics
| Metric | Value |
|---|---|
| Real-Time Factor (RTF) | 87.64x |
| Per-window Latency | 70-90ms |
| Throughput | ~18 windows/second |
| Processing Speed | 1 hour of audio in ~41 seconds |
Batch Inference Results
| File | Duration | Processing Time | RTF |
|---|---|---|---|
| roast-1 | 10:39 (639.7s) | 7.67s | 83.46x |
| roast-2 | 10:16 (616.6s) | 6.92s | 89.06x |
| roast-3 | 10:25 (625.6s) | 7.05s | 88.74x |
| roast-4 | 9:44 (584.8s) | 6.55s | 89.29x |
| Total | 41.1 min | 28.2s | 87.64x |
Latency Breakdown (per 10s window)
- Audio loading: 1-2ms
- Feature extraction: 20-30ms
- Model inference: 50-60ms
- Total: ~70-90ms per window
Resource Usage
- CPU Usage: 5-10% during inference
- Memory: ~1.5GB for model + 100MB working
- GPU Memory: ~2GB on MPS
- Latency overhead: 0.9% (90ms used / 10,000ms available)
Key Insight: The model processes audio 87x faster than real-time, providing a 111x headroom for real-time streaming detection. A 10-minute roast is fully processed in just ~7 seconds, making real-time monitoring easily achievable even with additional processing overhead.
The Warp Advantage
Throughout this project, Warp’s AI agent was instrumental in:
Rapid Prototyping – From idea to working pipeline in hours, not days
Best Practice Guidance – Suggested Label Studio and evaluation workflows
Code Generation – Created complete scripts for data processing, training, and inference
Iterative Refinement – Helped debug overfitting issues and improve annotation strategy
Documentation – Generated summaries, reports, and README documentation automatically
The development workflow felt more like pair programming with an engineer who knew PyTorch and audio processing.
What’s Next?
In Part 2, we’ll build MCP (Model Context Protocol) servers to:
- Expose the first crack detector as an API
- Create a control interface for the Hottop roaster
In Part 3, we’ll use .NET Aspire to orchestrate an intelligent roasting agent that:
- Monitors audio in real-time
- Detects first crack automatically
- Adjusts roaster parameters (heat/fan) to achieve target roast profiles
- Logs and learns from each roasting session
What’s Next?
The first crack detector is working well, but it’s just the beginning.
In Part 2: Building MCP Servers for Coffee Roasting, we’ll:
- Wrap the detector in an MCP server for real-time streaming
- Build a second MCP server to control the Hottop roaster (heat, fan, cooling)
- Implement authentication and safety controls
- Test end-to-end detection → action loop
In Part 3: Creating an Autonomous Roasting Agent, we’ll bring it all together:
- Use .NET Aspire to orchestrate multiple MCP servers
- Build AI agents that make real-time roasting decisions
- Implement safety rails and human override
- Roast a batch fully autonomously and compare against manual profiles
The goal: Press start, add beans when ready, hand off and observe and enjoy perfectly roasted coffee.
Follow along on GitHub or subscribe for Part 2!
Resources
Project & Tools:
Model & ML:
Audio Processing:
Coffee Roasting Context: