When working with Google Kubernetes Engine (GKE), you often want to control which nodes your workloads run on.
This is where Node Pools and Node Selectors come in.
In this guide, we’ll:
✅ Create a new GKE Node Pool
✅ Deploy a Kubernetes Deployment that uses a NodeSelector
✅ Verify Pod placement and access the application
🔹 Step 1: Introduction
We’ll be doing three things:
- Create a Node Pool in GKE
- Deploy a Kubernetes Deployment with a nodeSelector
- Verify and clean up resources
🔹 Step 2: Create a GKE Node Pool
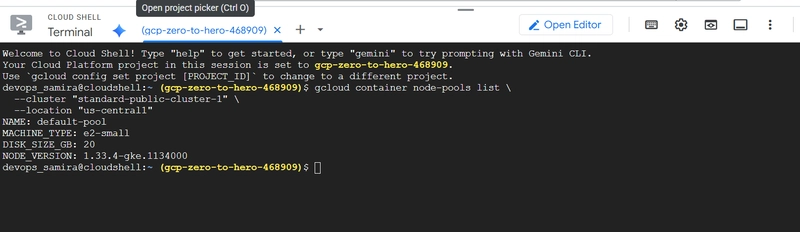
First, let’s check the existing node pools in our cluster:
# List Node Pools
gcloud container node-pools list \
  --cluster "standard-public-cluster-1" \
  --location "us-central1"

Now, create a Linux Node Pool with spot VMs:
# Create Linux Node Pool
gcloud container node-pools create "linuxapps-nodepool" \
  --cluster "standard-public-cluster-1" \
  --machine-type "e2-small" \
  --disk-size "20" \
  --num-nodes "1" \
  --location "us-central1" \
  --spot
Verify creation:
# List Node Pools again
gcloud container node-pools list \
  --cluster "standard-public-cluster-1" \
  --location "us-central1"


🔹 Step 3: Review Kubernetes Deployment Pod Specification with
NodeSelector
Now, let’s create a Deployment that forces Pods to run only on our new node pool.
📌 Create a file: 01-kubernetes-deployment.yaml
apiVersion: apps/v1
kind: Deployment
metadata:
  name: mylinuxapp-deployment
spec:
  replicas: 3
  selector:
    matchLabels:
      app: mylinuxapp
  template:
    metadata:
      name: mylinuxapp-pod
      labels:
        app: mylinuxapp
    spec:
      # 👇 NodeSelector ensures Pods only run in our node pool
      nodeSelector:
        cloud.google.com/gke-nodepool: linuxapps-nodepool
      containers:
        - name: mylinuxapp-container
          image: ghcr.io/stacksimplify/kubenginx:1.0.0
          ports:
            - containerPort: 80
📌 Create a LoadBalancer service: 02-kubernetes-loadbalancer-service.yaml
apiVersion: v1
kind: Service
metadata:
  name: mylinuxapp-lb-service
spec:
  type: LoadBalancer
  selector:
    app: mylinuxapp
  ports:
    - name: http
      port: 80   # Service Port
      targetPort: 80 # Container Port
🔹 Step 4: Deploy and Verify
Apply the manifests:
# Deploy Kubernetes Resources
kubectl apply -f kube-manifests/01-kubernetes-deployment.yaml
kubectl apply -f kube-manifests/02-kubernetes-loadbalancer-service.yaml
Check if Pods are running in the correct node pool:
# Verify Pods and their nodes
kubectl get pods -o wide

👉 Observation: Pods should be scheduled on nodes that belong to linuxapps-nodepool.
Now, get the service external IP and test the app:
# Access Application
kubectl get svc
Open in browser:
http://

🔹 Step 5: Clean-Up
When done, clean up resources.
# Delete Kubernetes Resources
kubectl delete -f kube-manifests/
If you don’t need the node pool anymore:
# Delete Node Pool (⚠️ keep if needed for next demo like DaemonSets)
gcloud container node-pools delete "linuxapps-nodepool" \
  --cluster "standard-public-cluster-1" \
  --location "us-central1"

✅ Recap
- Node Pools let you group nodes with different configurations inside a GKE cluster.
- Node Selectors ensure Pods are scheduled only on the nodes you want.
- Together, they give you fine-grained control over workload placement in GKE.
🌟 Thanks for reading! If this post added value, a like ❤️, follow, or share would encourage me to keep creating more content.
— Latchu | Senior DevOps & Cloud Engineer
☁️ AWS | GCP | ☸️ Kubernetes | 🔐 Security | ⚡ Automation
📌 Sharing hands-on guides, best practices & real-world cloud solutions