Introduction
Model Context Protocol (MCP) servers have revolutionized how AI applications access external tools and data sources. From web browsing with Playwright to documentation search with Context7, MCPs provide a standardized way to extend AI capabilities beyond their training data.
However, as the MCP ecosystem grows, managing multiple servers becomes increasingly complex. Each MCP server typically requires separate installation, configuration, and maintenance across different clients like Claude Desktop, Cursor, or Claude Code. This fragmentation creates several pain points:
- Configuration sprawl: Each client needs individual server configurations
- Dependency conflicts: Different servers may require conflicting Python versions or packages
- Resource overhead: Multiple server processes consume unnecessary system resources
- Maintenance burden: Updates and troubleshooting multiply across installations
FastMCP’s proxy capabilities solve these challenges by allowing you to bundle multiple MCP servers behind a single endpoint. Combined with FastMCP’s CLI tools, you can easily deploy this unified proxy to any MCP client with a single command.
I created a small github repo with example code if you’d like to follow along with it. alexretana/FastMCP-Simple-Proxy-Bundling
Important Warning: While bundling MCPs is convenient, be mindful of tool overload. Providing too many tools to an MCP client can overwhelm the AI model and degrade performance. Start with essential tools and add more selectively based on your specific workflow needs.
Installation
Install FastMCP
They recommend using uv to install and manage FastMCP. You can install it directly with uv pip or pip:
# Using uv (recommended)
uv pip install fastmcp

# Or using pip
pip install fastmcp

# Add as a tool through uv (My preference)
uv tool install fastmcp
Install uv (Required for MCP Client Integration)
FastMCP’s CLI tools require uv for dependency management when installing to MCP clients. Install uv for your platform:
Windows:
# Using PowerShell
powershell -ExecutionPolicy ByPass -c "irm https://astral.sh/uv/install.ps1 | iex"

# Or using pip
pip install uv
macOS:
# Using Homebrew (recommended)
brew install uv

# Or using curl
curl -LsSf https://astral.sh/uv/install.sh | sh
Linux:
# Using curl
curl -LsSf https://astral.sh/uv/install.sh | sh

# Or using pip
pip install uv
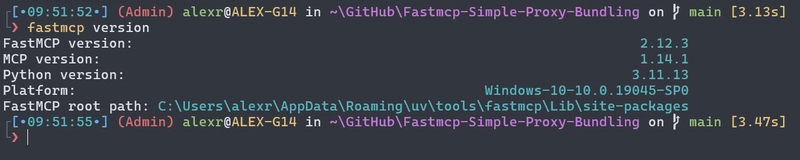
Verify Installation
To verify that FastMCP is installed correctly:
fastmcp version
You should see output like:
$ fastmcp version
FastMCP version:                           2.11.3
MCP version:                               1.12.4
Python version:                            3.12.2
Platform:            macOS-15.3.1-arm64-arm-64bit
FastMCP root path:            ~/Developer/fastmcp

Running with JSON Configuration
FastMCP can run servers directly from JSON configuration files, making it easy to define and deploy multi-server setups. Let’s create a configuration that bundles Context7 (documentation search) and Playwright (web automation) into a single endpoint.
Create a file named fastmcp.json:
{
  "$schema": "https://gofastmcp.com/public/schemas/fastmcp.json/v1.json",
  "environment": {
    "type": "uv",
    "python": ">=3.10",
    "dependencies": [
      "fastmcp"
    ]
  },
  "deployment": {
    "transport": "sse",
    "log_level": "DEBUG"
  },
  "mcpServers": {
    "context7": {
      "command": "npx",
      "args": ["-y", "@upstash/context7-mcp", "--api-key", "YOUR_API_KEY"]
    },
    "playwright": {
      "command": "npx",
      "args": ["@playwright/mcp@latest"]
    }
  }
}
Configuration breakdown:
- environment: Specifies Python version and FastMCP dependency
- deployment: Sets transport method and logging level
- mcpServers: Defines the backend servers to proxy
Replace YOUR_API_KEY with your actual Context7 API key from Upstash.
Now run the server using FastMCP CLI:
fastmcp run fastmcp.json --transport http --host localhost --port 53456
Note: the values I use in the cli call will overwrite options I picked in fastmcp.json file. I intentionally made them conflicting to point this out.

The server will start on http://localhost:53456 and automatically proxy requests to both Context7 and Playwright servers. You can test it by accessing the server endpoint directly or integrating it with MCP clients.
Although I didn’t demonstrate it here, the github repo also includes a dockerfile example if you need help getting started with dockerizing FastMCP.
Define a Python File and CLI Install Feature
While JSON configuration works well for direct server execution, you might prefer a Python-based approach for more complex scenarios or better IDE support. Let’s create a simple proxy server file.
Create mcp-proxy.py:
from fastmcp import FastMCP

# Your MCP servers configuration
config = {
    "mcpServers": {
        "context7": {
            "command": "npx",
            "args": ["-y", "@upstash/context7-mcp", "--api-key", "YOUR_API_KEY"]
        },
        "playwright": {
            "command": "npx",
            "args": ["@playwright/mcp@latest"]
        }
    }
}

# Create the proxy
mcp = FastMCP.as_proxy(config, name="Multi-MCP-Proxy")
This Python file defines the same proxy configuration as our JSON, but in a more programmatic format that allows for easier customization and extension.
Installing in Claude Code
FastMCP’s CLI makes installation trivial. For Claude Code:
fastmcp install claude-code mcp-proxy.py
![]()
This command automatically configures Claude Code to run your proxy server with all necessary dependencies managed by uv.
Installing in Claude Desktop
For Claude Desktop installation:
fastmcp install claude-desktop mcp-proxy.py

I got an error on my freshly installed claude desktop. That is because it couldn’t find the claude_desktop_config.json. You can go to Settings > Developer tab, and click ‘Edit Config’, and it’ll automatically make one. Then run the fastmcp install command again, and that should resolve.

The install command automatically updates Claude Desktop’s configuration file with the proper server entry, including dependency management through uv.
Testing the Installation
Open Claude Desktop (Note: you will need to restart Claude Desktop after installing the FastMCP server) and verify the installation worked by asking it to search for FastMCP documentation. I actually had many issues trying to do this. It ran in Claude Code just fine, but for some reason I couldn’t get context7 to work in Claude Desktop like this, only playwright. Honestly, Claude Code is better at using tools anyways, so you shouldn’t lean as much on Claude Desktop using tools. Granted that the context7 tool is pretty good for the ‘planning period’ of agentic development, so you’ll probably want to install it. Also, as of writing of this article, the MCP tool in Claude Desktop is a beta feature (so it can get better and more bug free in the future), and I believe they are trying to focus more on extension instead since Claude Desktop has a more general audience (not just programmers) compared to Claude Code. That’s just my speculations.
Just to finish this demonstration, I removed context7 temporarily from mcp-proxy.py, to show how a working mcp tool looks like in Claude Desktop.
From a new chat, you can click the plus, and see what mcp servers are available and what tools are exposed. You can even enable/disable why server or tool. You should definitely leverage this feature.

Now, to try out the tool, make a simple request like:
“using the playwright mcp tool, can go to gofastmcp.com ?”

The response should show that Claude successfully used the Playwright tool to go to the FastMCP homepage.
TL;DR: Create JSON or Python proxy configs, run with fastmcp run, install to clients with fastmcp install. Automatic dependency management via uv handles the complexity.
Conclusion
FastMCP’s proxy capabilities transform MCP server management from a fragmented, per-client configuration nightmare into a streamlined, centralized approach. By bundling multiple servers behind a single endpoint, you gain:
- Simplified deployment: One proxy serves all your MCP tools
- Consistent configuration: Single source of truth across all clients
- Resource efficiency: Fewer running processes and managed dependencies
- Easy maintenance: Update proxy configuration once, benefit everywhere
The CLI tools make integration seamless—whether you prefer JSON configurations for simplicity or Python files for programmability, FastMCP handles the complexity of dependency management and client integration automatically.
As the MCP ecosystem continues growing, this proxy pattern will become increasingly valuable for developers who want to harness multiple specialized tools without the operational overhead. Start with your most essential MCPs, test the performance impact, and gradually expand your toolkit as needed.
Remember: the goal isn’t to bundle every available MCP, but to create a curated, efficient collection that enhances your AI workflows without overwhelming the underlying models.